Pick Up the Needle: A Beginner's Honest Guide to Making Hats at Home
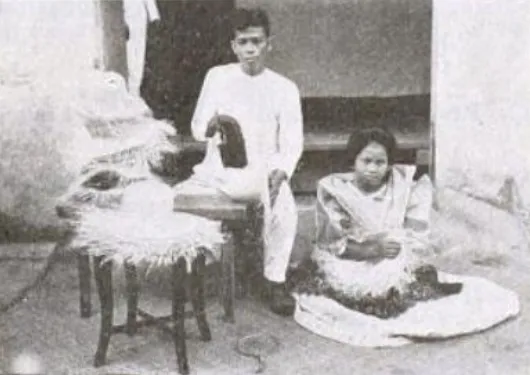
Photo: Edward T. Pickard, Chief, Textile Division, United States Bureau of Foreign and Domestic Commerce,, Public domain, via Wikimedia Commons
Somewhere between your third Pinterest board and your second YouTube rabbit hole, you started wondering: could I actually make one of these?
The answer is yes. And you don't need to drop a thousand dollars on a masterclass to find out.
Millinery has this reputation for being impossibly technical — a craft locked behind guild secrets and expensive equipment. Some of that mystique is earned. A couture blocked felt hat with hand-stitched trim? That takes years of practice. But your first fascinator, your first simple straw brim, your first wire-framed base wrapped in ribbon and silk? That's absolutely within reach on a beginner's budget, working out of your own home.
I started making hats in a space that was less studio and more organized chaos. No formal training at first — just curiosity, cheap supplies, and a lot of trial and error. What I learned along the way is that millinery rewards persistence far more than perfection. So let's talk about how to actually begin.
Start With the Right (Affordable) Tools
You don't need everything at once. Here's what actually matters for a beginner setup:
A good steam iron or handheld steamer. This is non-negotiable. Steam is how you shape, mold, and set materials in millinery. A basic handheld steamer runs anywhere from $25 to $50 and will serve you well through dozens of projects.
A hat block or a substitute. Traditional wooden hat blocks are beautiful and useful — and expensive. As a beginner, you can start with a foam head form (available on Amazon for under $15), a round bowl, or even a blown-up balloon covered in plastic wrap as a temporary dome shape. It's not glamorous, but it works while you're learning.
Millinery wire. This thin, flexible wire is what gives hat brims their shape and structure. It's inexpensive and widely available through craft suppliers like Judith M Millinery or even Etsy shops. Buy a small roll to start.
Basic hand-sewing supplies. A curved needle, strong thread (upholstery thread works great), and sharp scissors. That's really it.
Buckram or sinamay. Buckram is a stiffened fabric used to build hat bases. Sinamay is a woven straw-like material that's popular for fascinators and lightweight summer pieces. Both are beginner-friendly and affordable — usually a few dollars per yard.
Skip the expensive blocking equipment and specialty adhesives until you know you love this. Get a feel for the craft first.
Your First Project: The Fascinator Base
If you want a beginner win that actually looks polished, start with a simple fascinator base. It's small, forgiving, and lets you practice the core skills — cutting, wiring, and covering — without committing to a full hat.
Here's the basic process:
- Cut an oval or circle shape from buckram (roughly 4–6 inches wide).
- Shape millinery wire around the edge and hand-stitch it in place.
- Steam the base lightly to help it curve and conform to a head shape.
- Cover it with sinamay, fabric, or felt, folding the edges under and securing them.
- Add a comb or clip to the underside for wearing.
- Decorate with ribbon, feathers, flowers, or whatever speaks to you.
That's it. Your first millinery piece. It won't be perfect, and that's fine — it'll be yours, and you'll have learned more from making it than from watching ten tutorials.
Common Beginner Mistakes (and How to Dodge Them)
Let's save you some frustration:
Using too much glue. Hot glue is tempting because it's fast, but it creates lumpy, visible seams and doesn't age well. Train yourself to hand-stitch where possible. It takes longer and feels tedious at first, but the results are night-and-day better.
Skipping the steam. Trying to shape materials without steam is like trying to iron a shirt dry. Steam activates the stiffening agents in buckram and sinamay, making them pliable and moldable. Don't skip this step.
Buying too much before you know what you like. It's tempting to stock up on every color of sinamay and twelve different feather types. Resist. Start with one neutral base material and one accent. Figure out your style before you fill a storage bin.
Rushing the finishing. The inside of a hat — the lining, the edge finishing, the way the comb is attached — is what separates a craft project from a wearable piece. Slow down at the end of a project. Those final details matter.
Comparing your first piece to professional work. You will see milliners online whose hats look like sculpture. They've been doing this for years. Your first hat is not supposed to look like that. Give yourself the grace of a beginner.
Where to Learn More (Without Paying a Fortune)
The millinery community is genuinely generous with knowledge. Here's where to dig in:
YouTube has a solid range of free tutorials, from basic fascinator construction to more advanced blocking techniques. Search specifically for "millinery tutorial for beginners" and look for channels with multiple videos — consistency usually means quality.
Craftsy and Skillshare both carry millinery courses at much lower price points than dedicated workshops. Some Skillshare courses are included in the basic subscription, which you may already have.
Millinery supply shops often have free resource sections on their websites. Judith M Millinery (based in the US) is a great starting point — their site has tutorials alongside their product listings.
Reddit's r/millinery is small but active, and people there are genuinely helpful to beginners asking honest questions.
Local fiber arts guilds sometimes include milliners or hat-adjacent crafters. It's worth searching your area — in-person community is irreplaceable when you're troubleshooting a weird brim shape.
This Is How a Hat Obsession Starts
I'll be honest with you: most people who start making hats don't stop at one. There's something about the process — the shaping, the problem-solving, the moment a flat piece of buckram becomes a three-dimensional wearable thing — that gets under your skin.
Millinery is one of those crafts that rewards you in layers. The first layer is the finished piece. The second is the skill you built making it. The third, if you keep going, is the quiet confidence that comes from knowing you can create something beautiful with your own hands.
You don't need a formal apprenticeship. You don't need a studio. You need a steamer, some basic materials, a willingness to make mistakes, and the curiosity to keep going.
The hat is waiting. Go make it.